Overview
Imagine having an AI assistant that can answer questions based on your blog posts. This AI assistant can provide accurate information by understanding the context of the queries and retrieving relevant content from your blog posts.
This guide will help you build your conversational bot using Azure AI Search and Azure OpenAI. The AI models will be trained on your blog posts, enabling the bot to answer questions accurately.
For my blog, I’ve named the bot christosbot. You can customize the name and the content based on your blog posts.
NOTE: This guide assumes you have a basic understanding of Azure services and AI concepts.
Architecture
The architecture for christosbot is built around three key Azure components: Azure Storage, Azure OpenAI, and Azure AI Search. Together, they enable the seamless integration of blog posts, AI models, and advanced search capabilities to create an intelligent, conversational bot.

Resources:
- Azure Storage Account: This is where all your blog posts are stored. We use a storage container to house the raw content which will be indexed and processed later by Azure AI Search.
- Azure OpenAI Service: The AI powerhouse of our setup. This service provides two AI models:
- text-embedding-ada-002: A model used to transform blog posts and search queries into numerical vectors. These vectors capture the semantic meaning of the text, making searches more accurate.
- gpt-4: A cutting-edge language model used for answering questions based on the blog content.
- Azure AI Search: A cloud-based search engine that indexes the blog posts stored in Azure Storage and enables semantic search. By leveraging the text-embedding-ada-002 model, it allows the bot to retrieve relevant content, not just based on keywords but based on the meaning and intent behind the query.
Rationale:
- Azure AI Search provides robust, scalable indexing with semantic capabilities that can interpret the context behind search queries. It’s perfect for creating a chatbot that needs to understand and deliver meaningful results from a dataset.
- Azure OpenAI offers pre-trained models (like GPT-4) that can understand, process, and generate human-like responses. By using text-embedding-ada-002, we enhance the system’s ability to “understand” and interpret complex language patterns.
- Azure Storage offers a cost-effective, highly durable way to store the content that powers the bot. It integrates smoothly with Azure AI Search, making the entire process of loading and vectorizing data seamless.
Understanding Text Embeddings & Semantic Search
When talking about building an AI bot that understands and retrieves information based on meaning, two concepts are critical: text embeddings and semantic search.
Text Embeddings
Text embeddings are a way to transform textual data (like blog posts) into numerical representations called vectors. These vectors capture the semantic meaning of the text, which allows the AI to understand and process language beyond simple keywords. Each blog post and search query is transformed into a vector using the text-embedding-ada-002 model in Azure OpenAI.
In simpler terms, the AI learns not just the words but the relationship between words, enabling it to grasp the intent behind queries.
Example: The phrases “how to write a blog” and “creating a blog post” might not share any keywords, but their meanings are similar. Text embeddings help the AI recognize this similarity.
Semantic Search
Semantic search enhances traditional keyword-based search by considering the meaning and context of the search query. Instead of returning results based purely on exact keyword matches, the semantic search looks for content that is most relevant based on the meaning behind the query.
In our setup, Azure AI Search uses semantic ranking to determine which blog post or piece of content is most relevant to the user’s query. It does this by comparing the vectors (generated by the text-embedding model) of the query and the indexed blog posts.
Semantic ranking ensures that the results aren’t just technically correct but contextually relevant.
How it works:
- Vectorization: Each blog post is transformed into vectors through text-embedding-ada-002, capturing the underlying meaning of the text.
- Query Processing: When a user asks a question, the query is also vectorized using the same model.
- Matching & Ranking: Azure AI Search compares the vectorized query with the blog post vectors, ranking them based on semantic relevance rather than just keyword overlap.
This process allows christosbot to provide answers that are more aligned with the question’s intent, making it a powerful tool for content-driven interactions.
Step-by-Step Guide
Building the bot involves a series of steps that integrate Azure AI Search and Azure OpenAI to create a conversational AI assistant. Here’s a detailed guide on how to set up the bot, starting from uploading blog posts to Azure Storage to testing the bot’s functionality.
Preliminary
Before proceeding with the implementation of the chatbot, it is essential to ensure that the correct Role-Based Access Control (RBAC) roles are assigned. Properly configured permissions are crucial for the smooth operation of Azure AI Search and Azure OpenAI, as they govern what resources can be accessed and manipulated by each component.
Ensure the correct RBAC roles are assigned:
- Azure AI Search must have:
- Storage Blob Data Reader on the Storage Account
- Cognitive Services User on Azure OpenAI
- Azure OpenAI must have:
- Search Service Contributor on Azure AI Search
- Search Index Data Reader on Azure AI Search
- The User must have:
- Cognitive Services OpenAI Contributor on Azure OpenAI Service


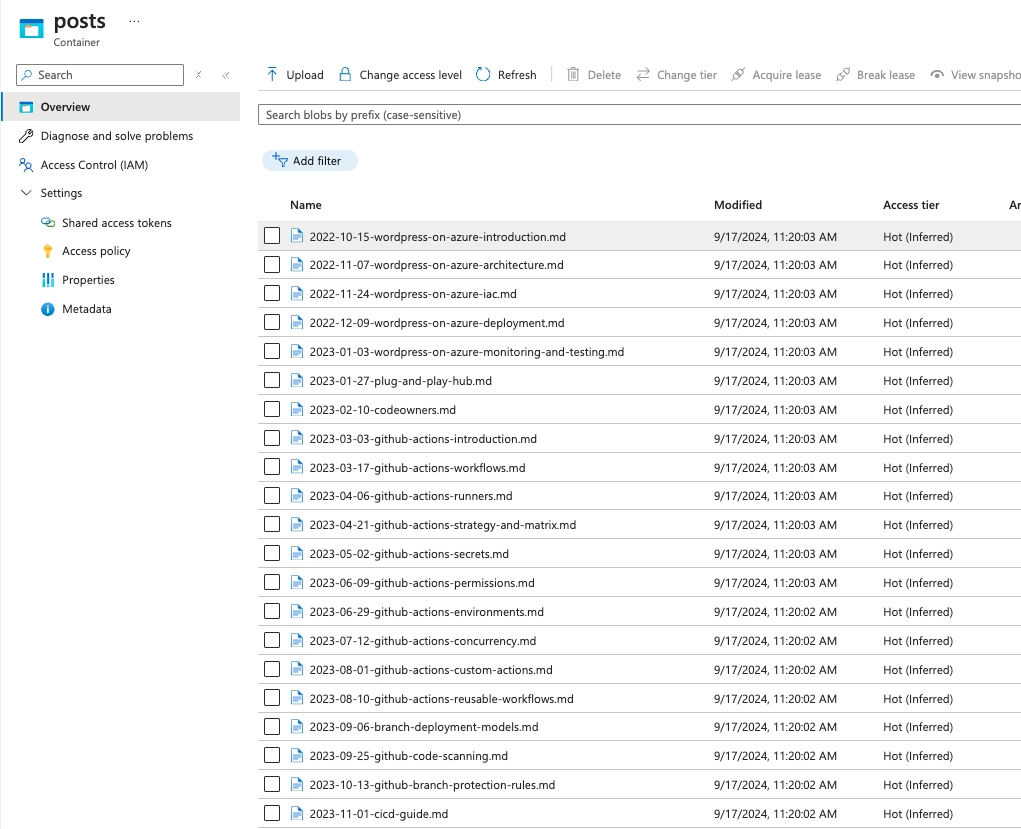
1. Upload Blog Posts to Azure Storage Account
Start by uploading all the blog posts to a container in Azure Storage. This is where Azure AI Search will retrieve the content during the indexing process.
2. Create Models in Azure OpenAI Service
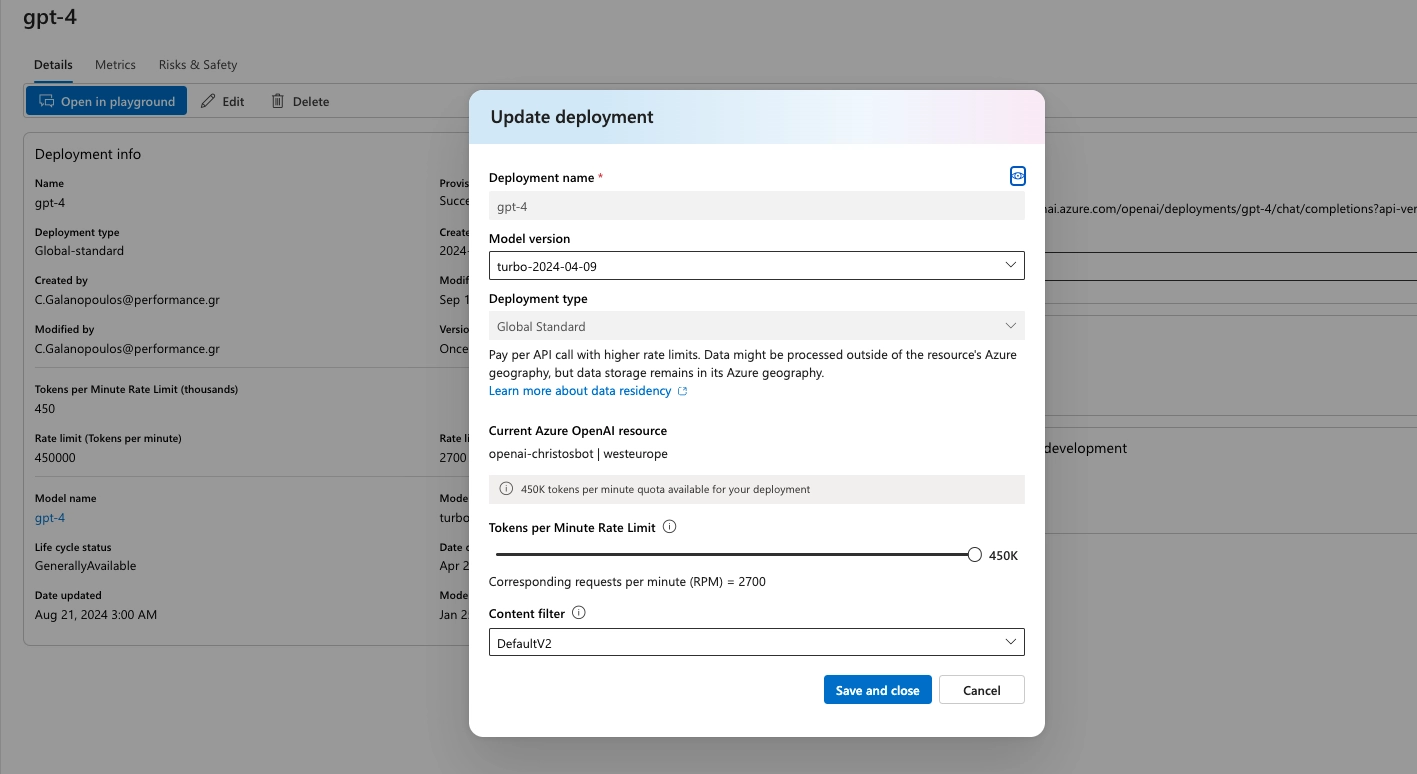
Deploy two models in Azure OpenAI:
- text-embedding-ada-002: For vectorizing the blog posts and search queries.
- gpt-4: For answering questions based on the blog content.

Increase the Tokens per Minute Rate Limit for the gpt-4 model to ensure better performance.
3. Vectorize Blog Posts in Azure AI Search
In Azure AI Search, follow these steps:
- Choose the Import and vectorize data option.
- Choose the storage account and container with the data.
- Select the text-embedding-ada-002 model for vectorization.
Make sure to enable semantic ranking for better result accuracy.
4. Add Data Source to Azure OpenAI Chat Playground
Now, integrate the search functionality into the chat environment:
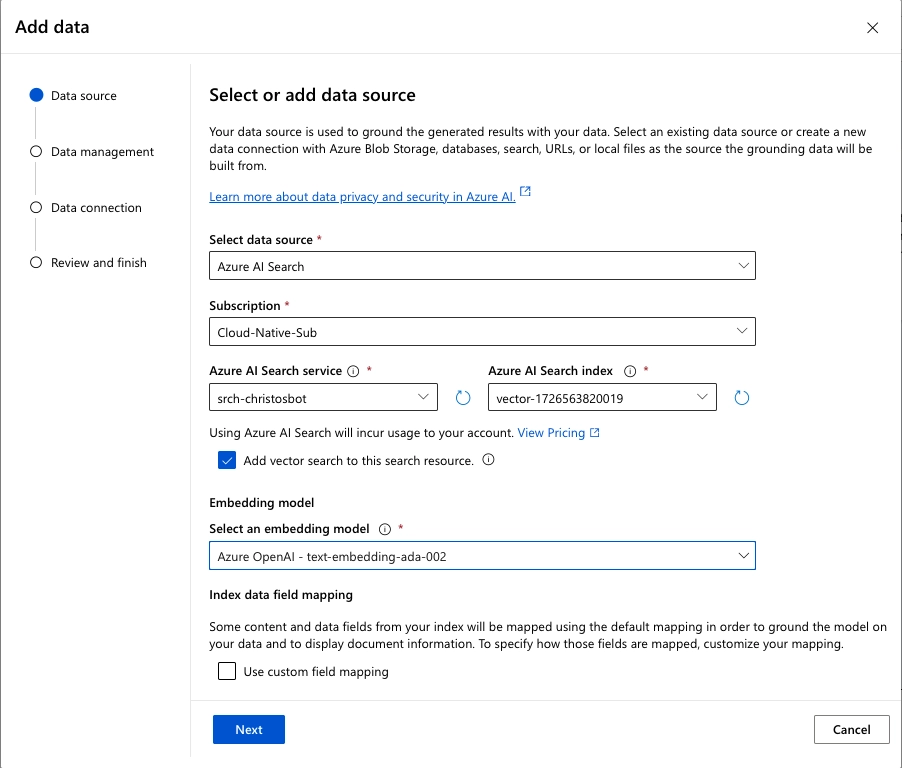
- Go to the Azure AI Studio > Playgrounds > Chat.
- Select the deployed gpt-4 model.
- Add the Azure AI Search data source.
- Choose the index created in the previous step.
- Enable vector search with the text-embedding-ada-002 model.
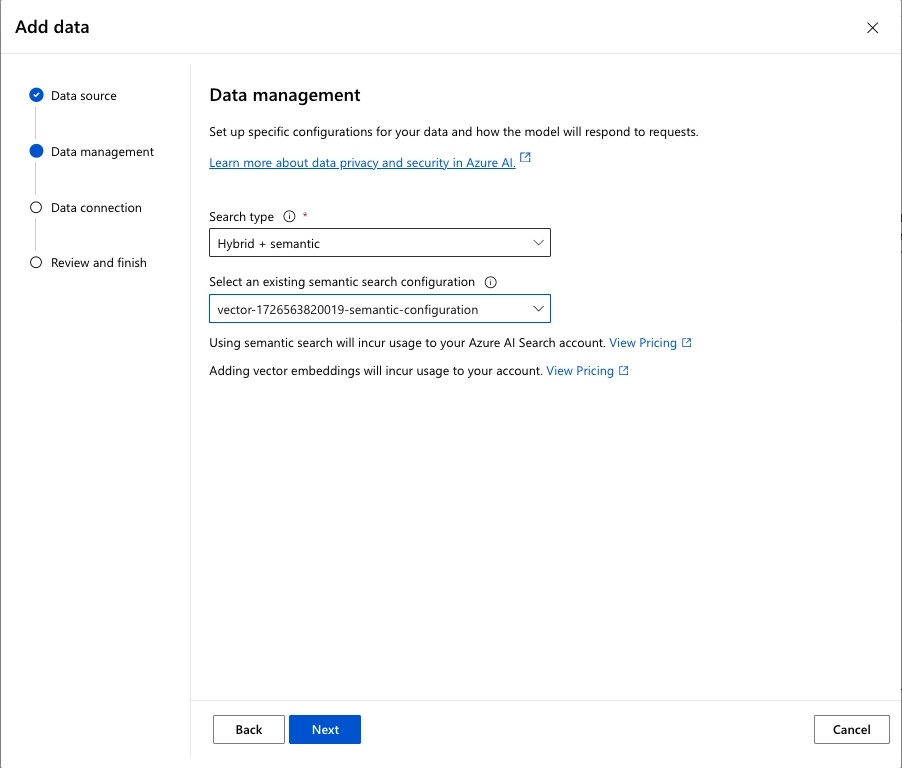
- Select Hybrid + semantic search type.
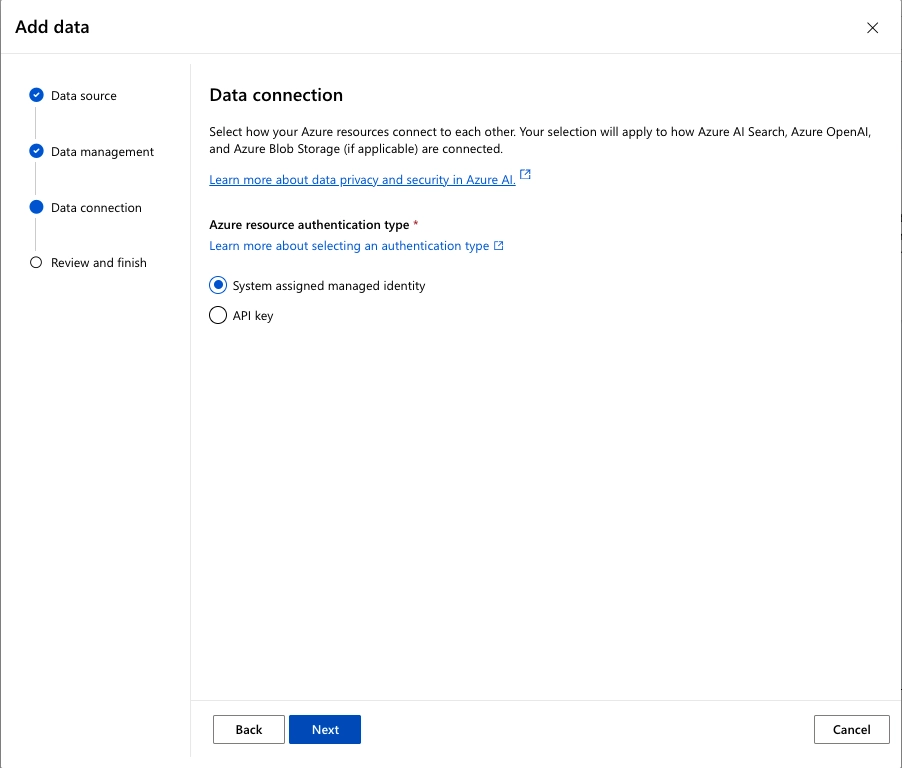
- Use system-managed identity for authentication.
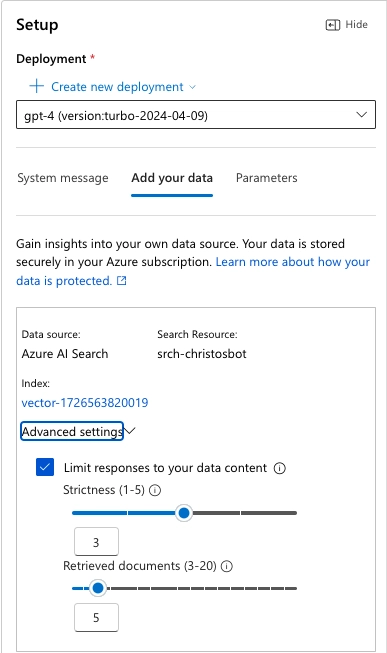
Adjust the Advanced settings of the data source.
5. Test christosbot
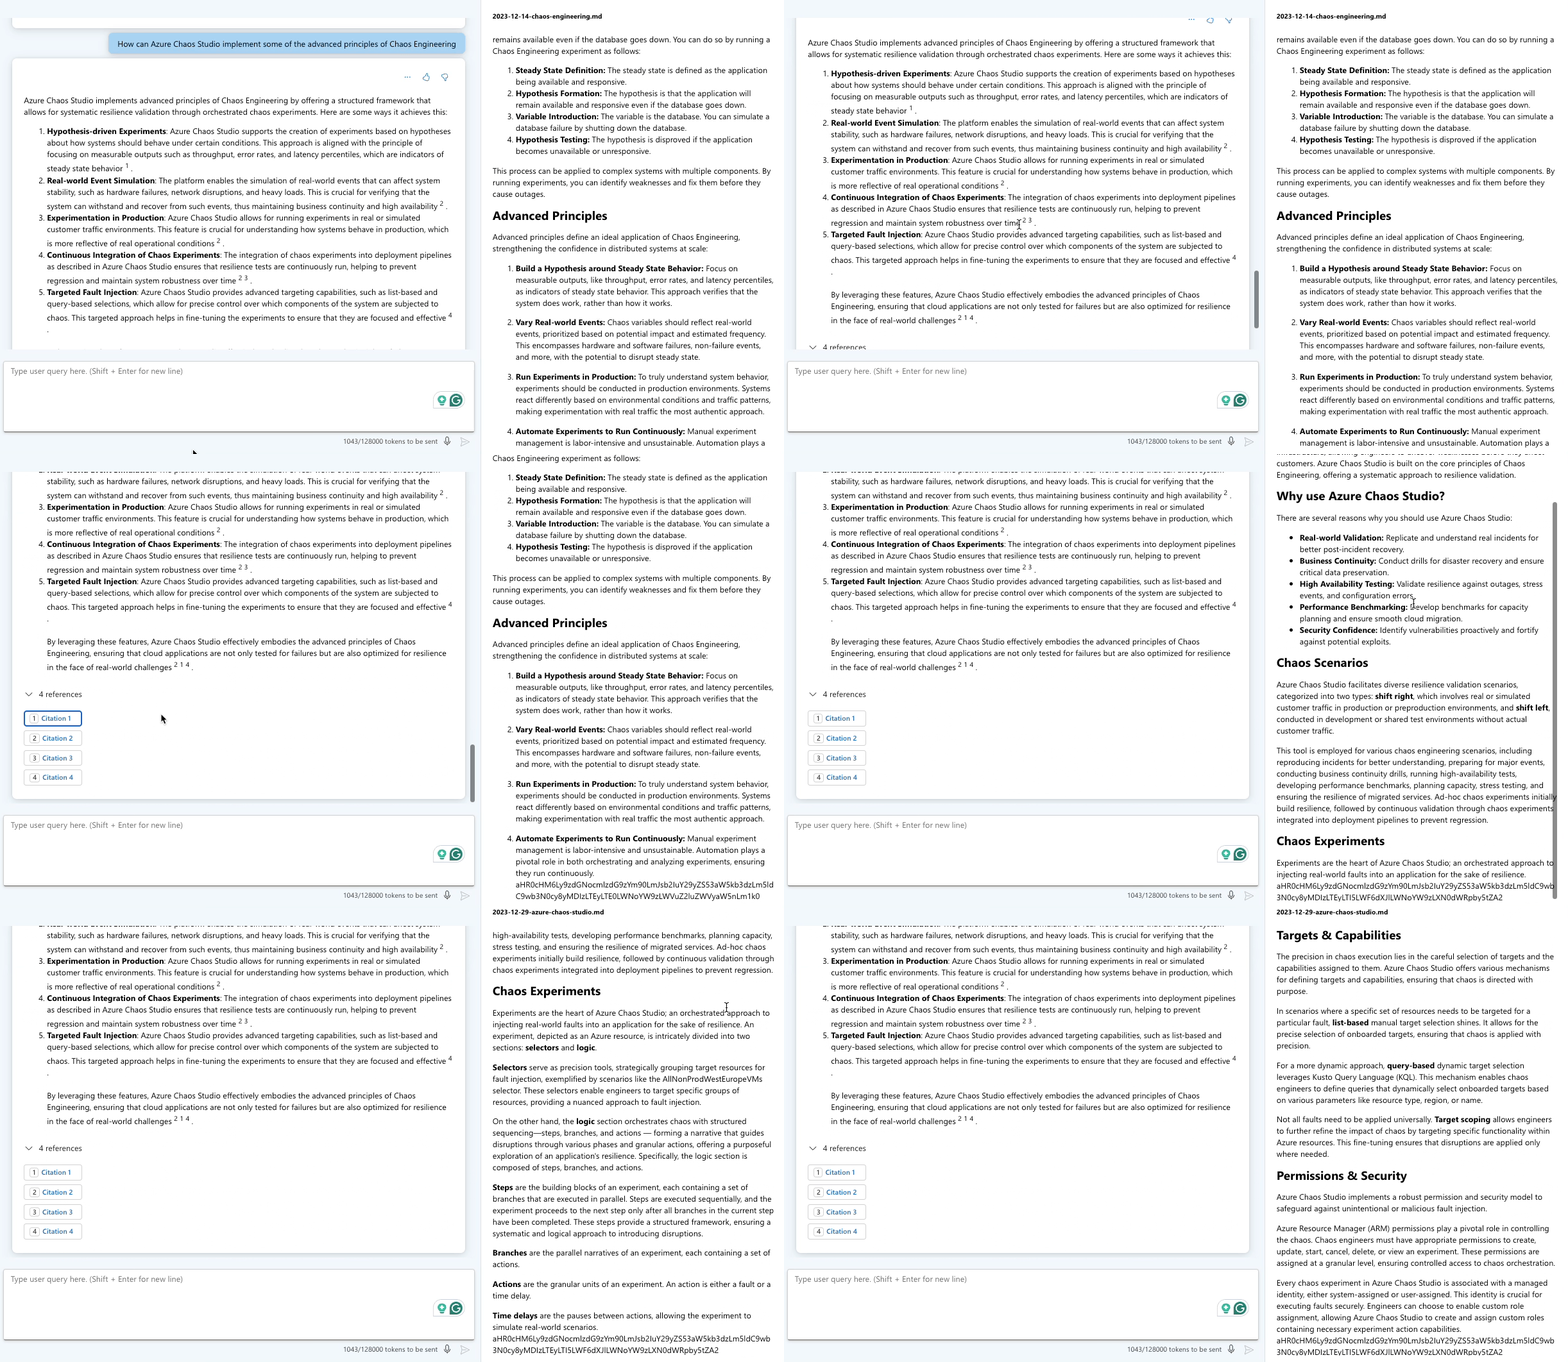
Start asking gpt-4 questions about the blog posts. The chat system will fetch the relevant content from the indexed blog posts using semantic search and provide accurate answers.
Here are some examples of the queries I asked:
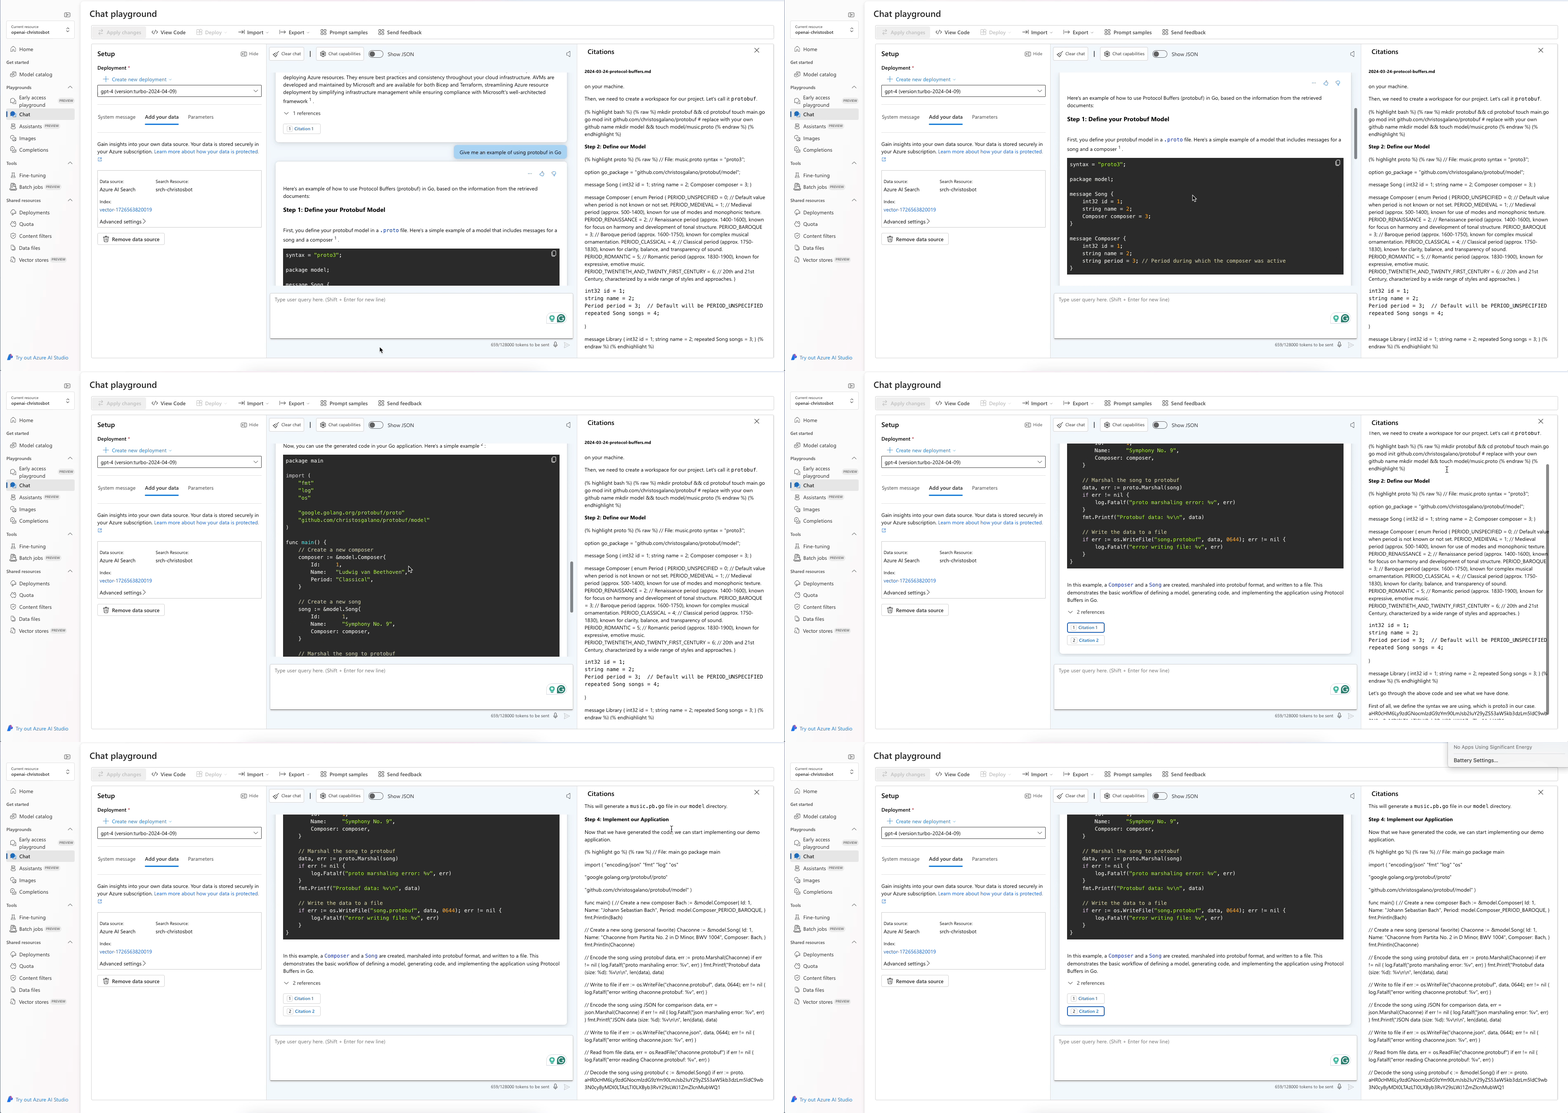
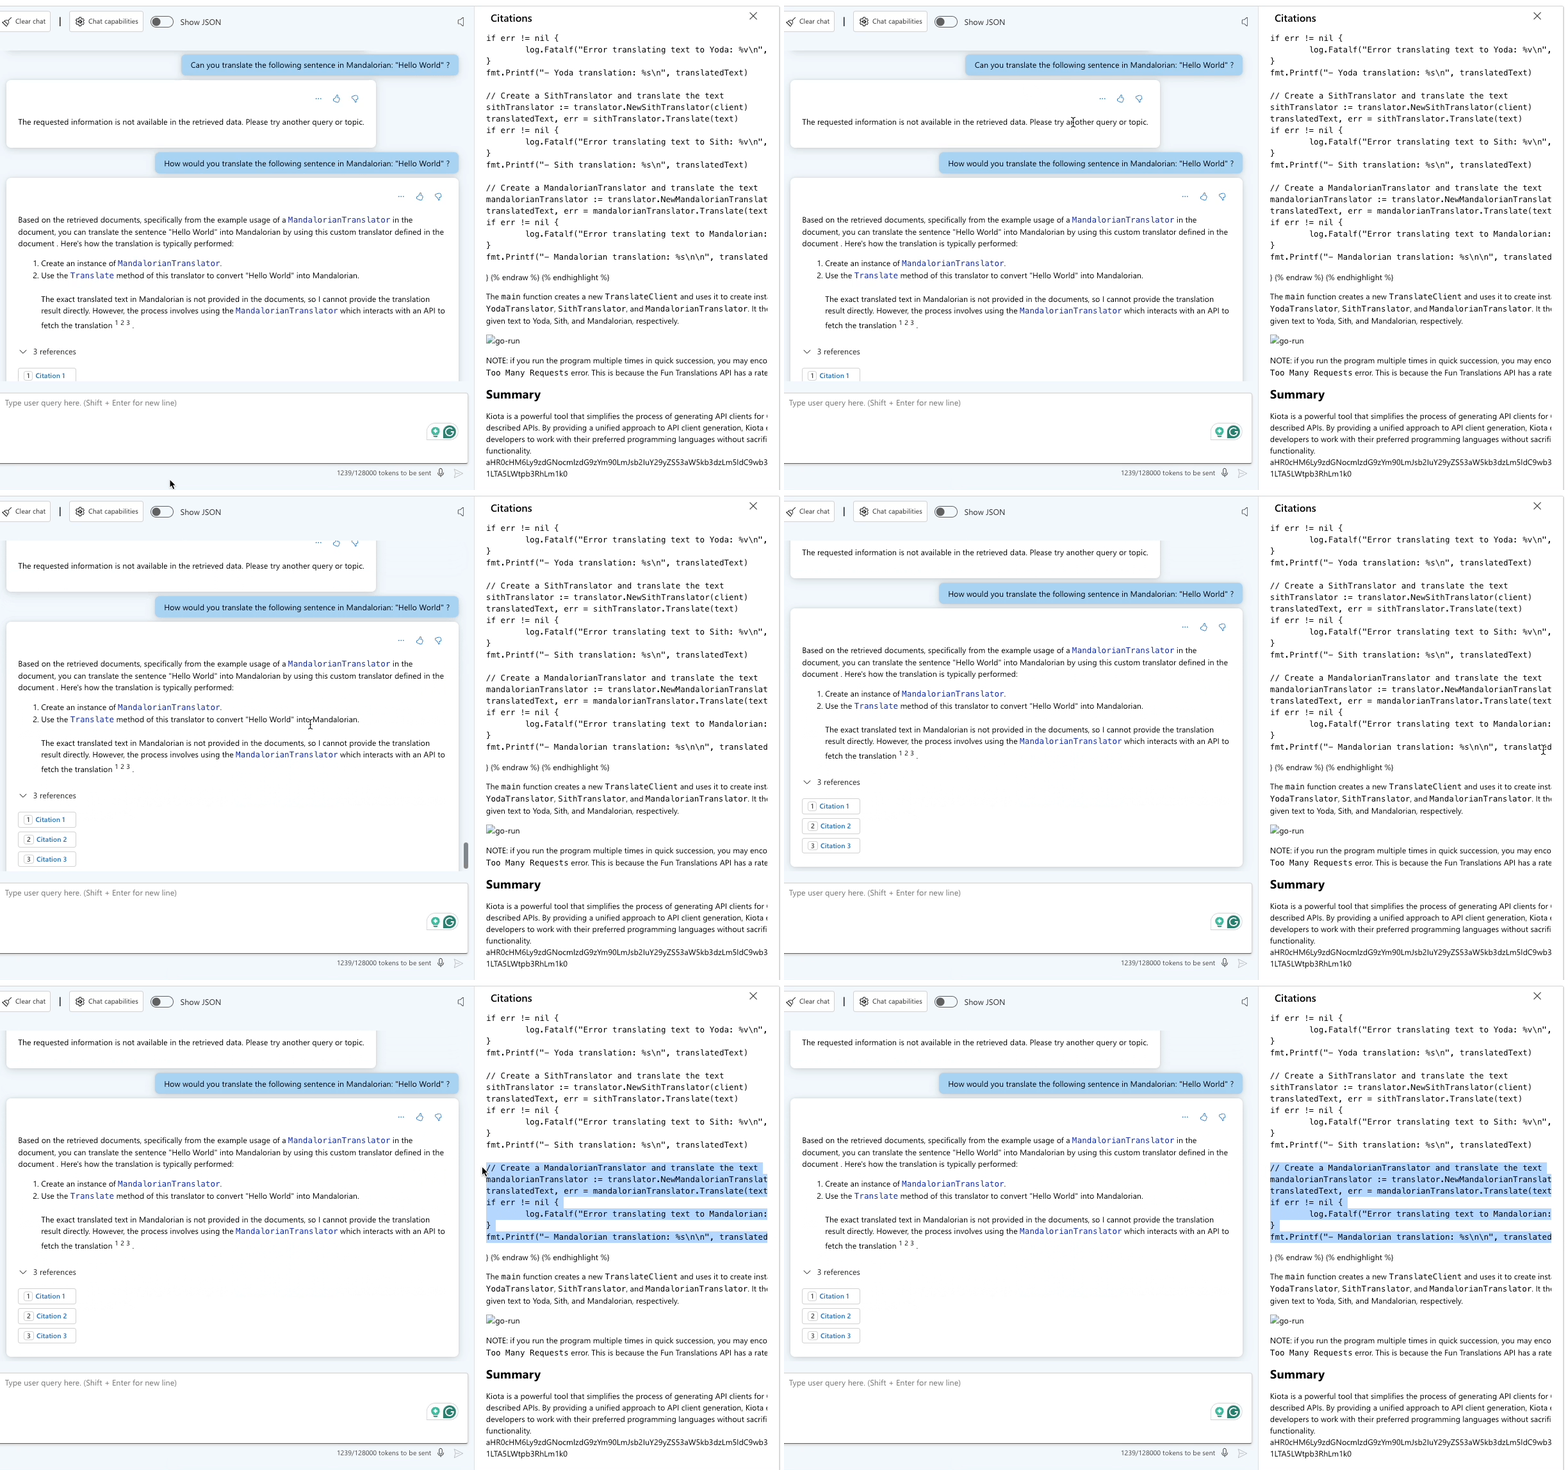
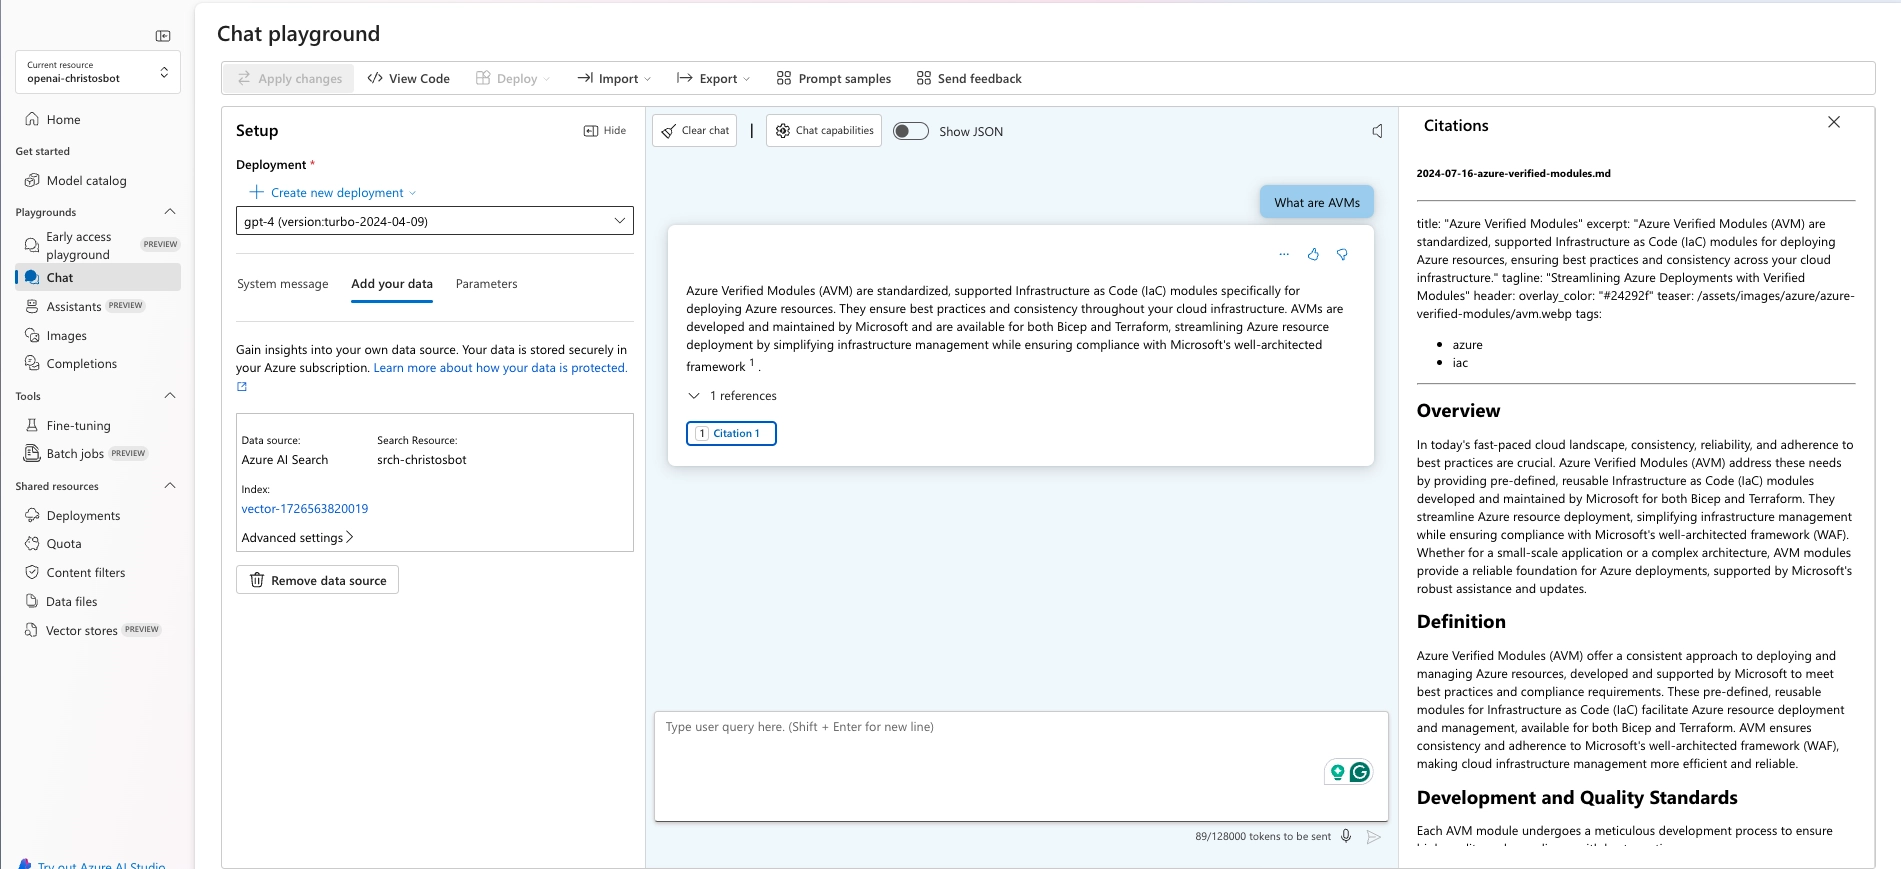
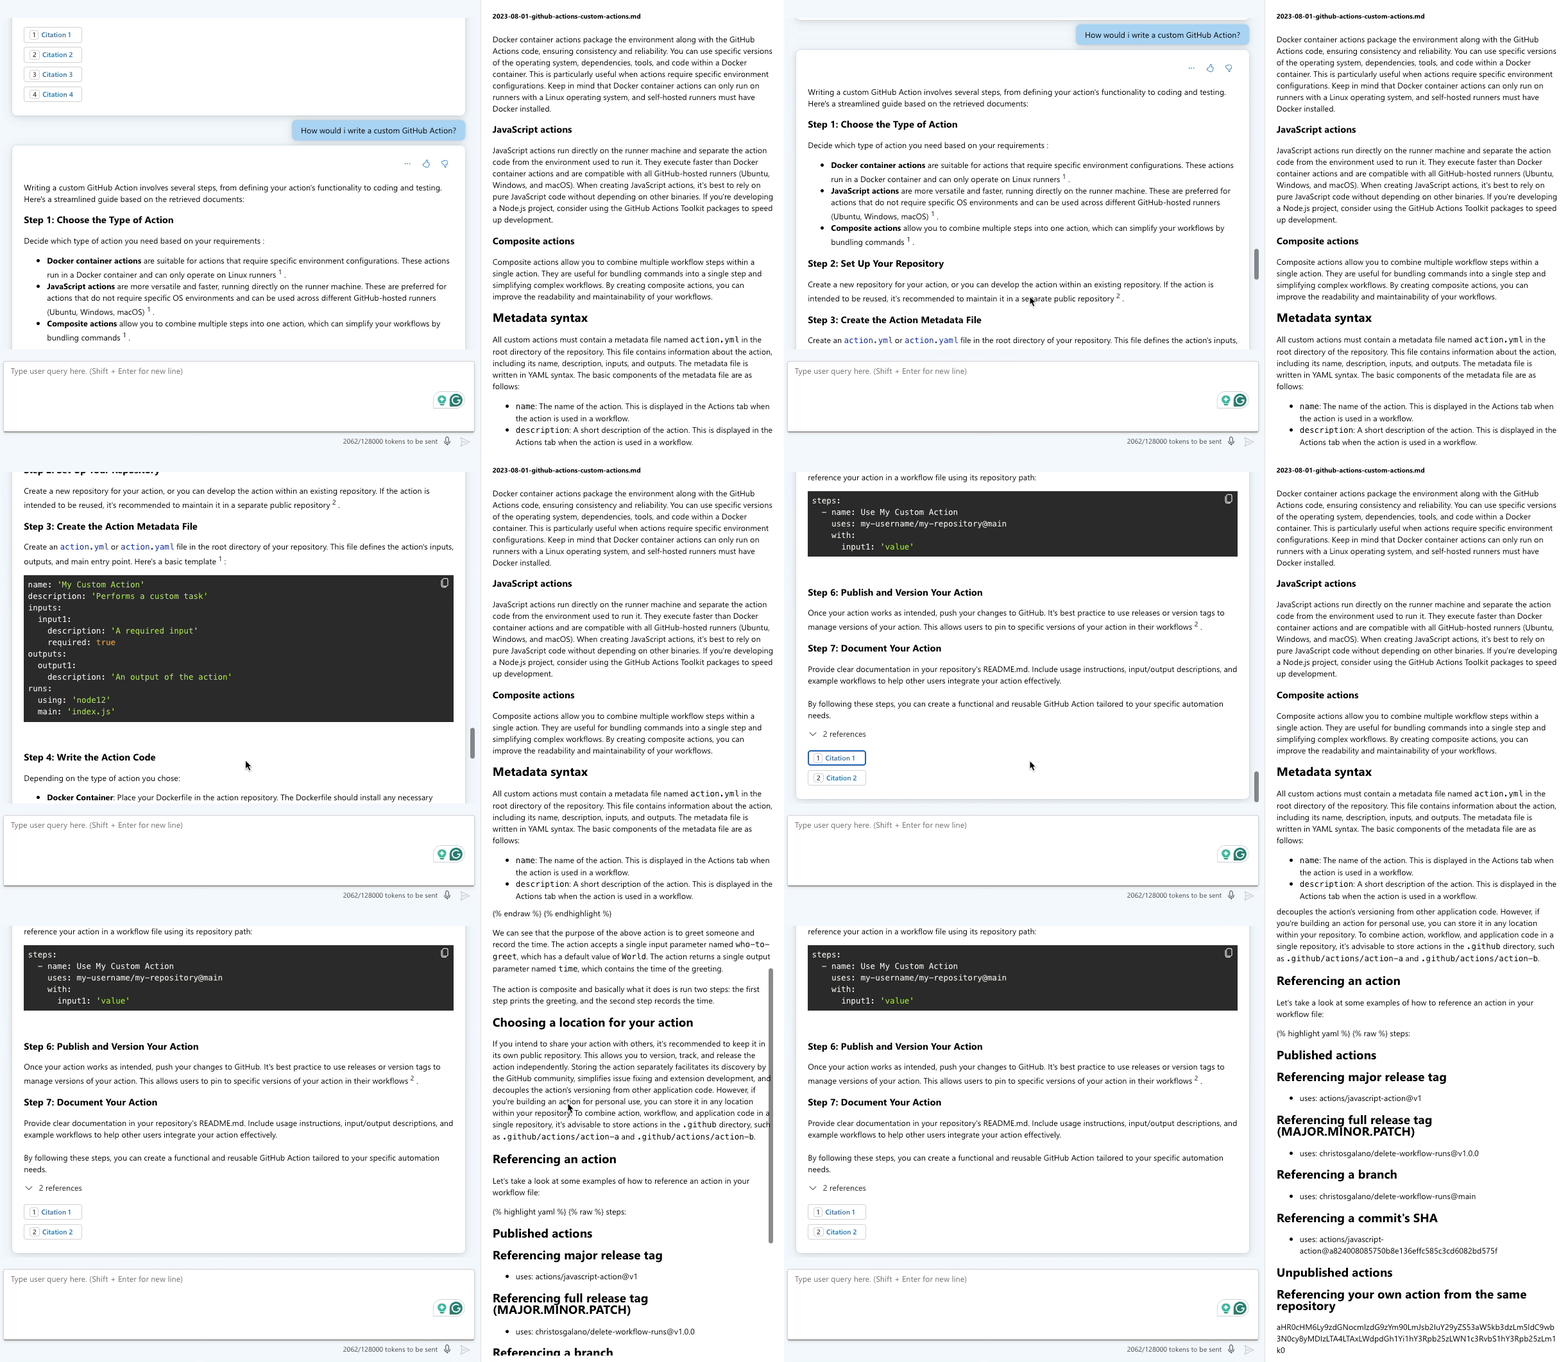

On the previous query, the bot failed to provide an answer because the content was unrelated to the blog posts.
Summary
This post offers a detailed guide on creating a chatbot using Azure AI Search and Azure OpenAI. By following the step-by-step instructions, you can build a personalized AI assistant to improve user engagement with your content.
Feel free to explore these powerful tools and experiment with creating your own chatbots for interacting with content!


Leave a comment