Overview
Deploying your application or infrastructure to different environments is a crucial part of the software development process. However, managing and configuring these environments can be a complex and time-consuming task, especially if you have multiple environments with different requirements and configurations. Inconsistent environments can lead to compatibility issues or errors that can impact the reliability and performance of your application. Fortunately, GitHub Environments can help you streamline the deployment process and ensure consistency across different environments. With GitHub Environments, you can define, manage, and protect your environments by creating rules and access policies for each environment.
What are GitHub Environments?
GitHub environments are a feature that allows you to create multiple “environments” for your code, such as development, staging, and production. Each environment is a separate instance of your code, with its own settings and configurations. This allows you to test and deploy your code in a controlled and reproducible way.
Why use GitHub Environments?
There are several reasons why GitHub environments are useful for development teams:
-
Improved collaboration: Environments allow teams to collaborate more effectively, by providing a way to share code and test changes in a controlled environment.
-
Streamlined testing: With environments, you can easily test your code in different environments, such as staging or production, without affecting your production code.
-
Increased reliability: Environments provide a way to ensure that your code is tested and working properly before it is deployed to production, reducing the risk of errors or bugs.
How to use GitHub Environments
Setting up GitHub environments is a straightforward process. Here are the steps you need to follow:
-
Define your environments: Before you create your environments, you need to define what environments you will use. Common environments include development, staging, and production.
-
Create your environments: Once you have defined your environments, you can create them in GitHub. To create an environment, go to the “Environments” tab in your repository, and click “New environment”.
-
Set up your environment: Once you have created your environment, you can configure it with the settings and configurations that you need like variables and secrets scoped specifically to this environment.
-
Deploy your code: Once your environment is set up, you can deploy your code to it. You can use GitHub Actions to automate this process, and ensure that your code is deployed consistently across all environments. The
environmentkeyword in GitHub Actions allows you to specify the environment to which your code should be deployed. This is particularly useful when you have multiple environments, such as development, staging, and production, and you want to ensure that your code is deployed to the correct environment.
Example
Let’s take a look at an example:
name: environments

on:
  workflow_dispatch:

jobs:
  dev:
    runs-on: ubuntu-latest
    environment: development
    steps:
      - name: Checkout
        uses: actions/checkout@v4
      - name: Deploy to development
        run: |
          echo "Deploying to ${{ vars.ENV }} ..."
  prod:
    runs-on: ubuntu-latest
    environment: production
    steps:
      - name: Checkout
        uses: actions/checkout@v4
      - name: Deploy to production
        run: |
          echo "Deploying to ${{ vars.ENV }} ..."
Here, the workflow is triggered manually. We have two jobs which both check out the code and print a message.
The environment keyword is used to specify each job’s environment.
The vars context is also showcased. These configurations can be set by going to “Settings/Environments” and selecting the environment you want to configure.
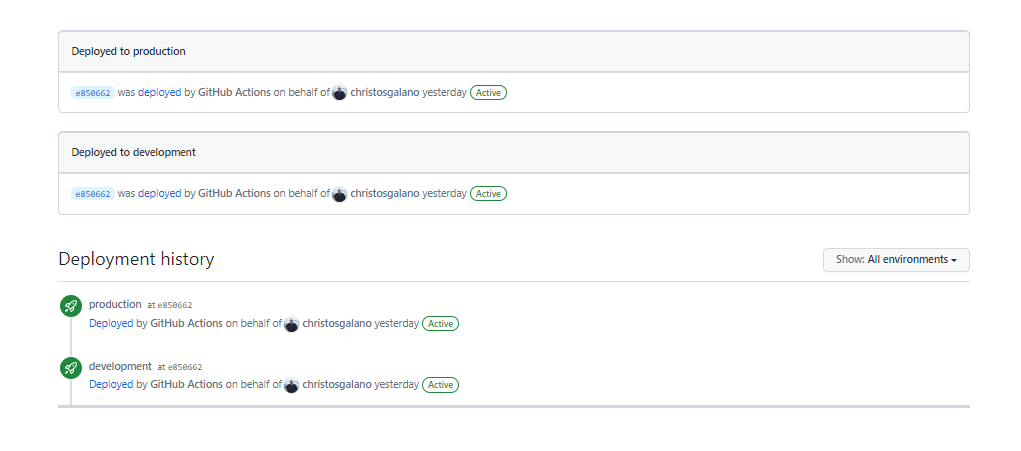
Now let’s see the output of the deployments that occurred:
Summary
GitHub environments are a powerful feature that can help streamline your development workflow and improve collaboration among team members. By creating multiple environments, you can test and deploy your code in a controlled and reproducible way, reducing the risk of errors or bugs. If you’re not already using environments in your development workflow, now is a great time to start!


Leave a comment