General
Hello everyone! In today’s blog post, we set up monitoring and testing for our WordPress site.
Set up monitoring
Activate the Application Insights plugin
- Go to the Application Insights resource and copy its Instrumentation Key

-
Login to WordPress at https://.azurewebsites.net/login
-
Go to Plugins, install and activate the Application Insights plugin

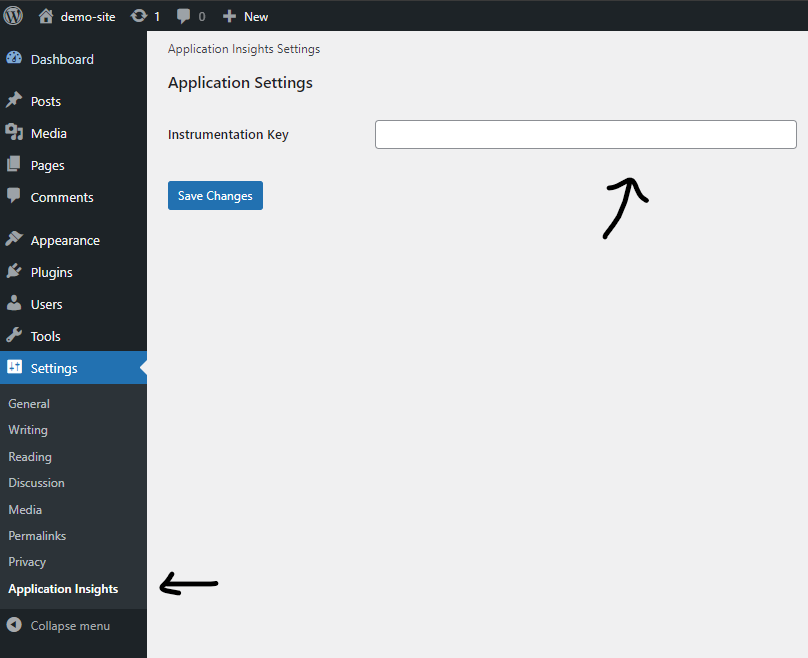
- Go to Settings -> Application Insights and set the Instrumentation Key

- Wait 5 minutes for the integration to take place
Perform some tests
Enable the Availability Test
The web_test module was included in the main deployment template. The specified module creates a standard availability test that performs a GET request to our WordPress site from various locations periodically. If the responses have a status code of 200, they are considered successful; otherwise, they are not. In order to enable this test:
-
Go to the Application Insights resource and select the Availability tab
-
Click on the test and enable it

Perform a Load Test
-
Go to the Azure Load Testing resource that was created
-
On the Upload a JMeter script option, click Create
-
For the Test Plan provide the tests/load_test_wordpress.jmx
-
In the Monitoring tab click Add/Modify and select the Application Insights resource that is connected to the WebApp
-
On all the other tabs, provide the desired values
-
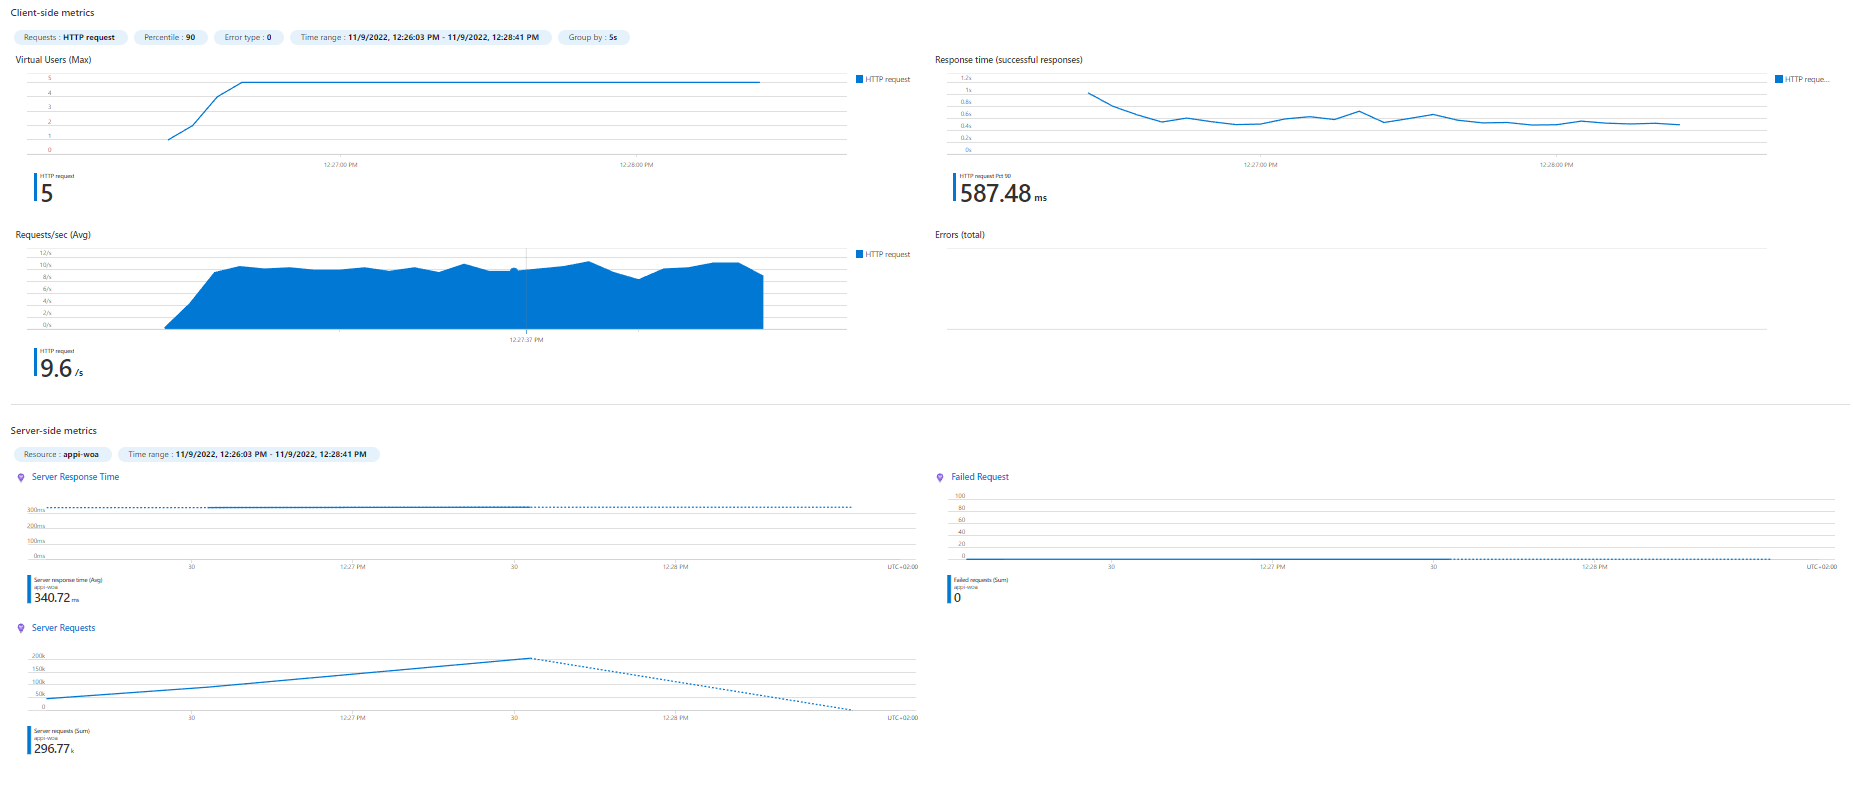
Create and run the load test

Teardown the infrastructure using the destroy.yaml workflow
Approve teardown
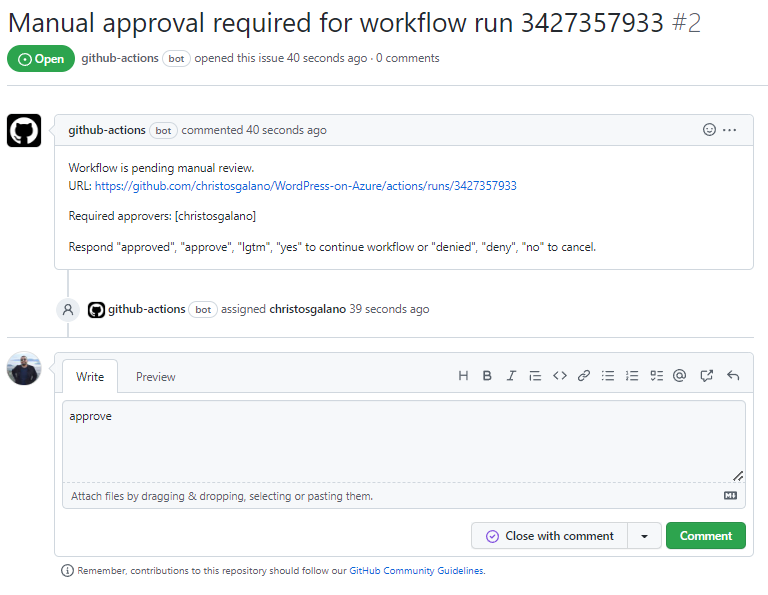
- In order to destroy the infrastructure, we first require some approvals using the following action:
- name: Manual Workflow Approval
  uses: trstringer/manual-approval@v1.6.0
  with:

# All approvers must be contributors in the repository

    approvers: approver-1,approver-2,...,approver-N  # use commas with no space inbetween
    minimum-approvals: x
secret: ${{ github.TOKEN }}-
This action will open up an Issue, where “x approvers” must respond in a positive manner (as mentioned in the issue’s description) in order to proceed to the next step
-
If at least one approver responds negatively, the workflow fails

Destroy the infrastructure
- name: Azure Login
  uses: Azure/login@v1
  with:
    client-id: ${{ secrets.AZURE_CLIENT_ID }}
    tenant-id: ${{ secrets.AZURE_TENANT_ID }}
    subscription-id: ${{ secrets.AZURE_SUBSCRIPTION_ID }}

- name: Delete the resource group and all of its resources
  uses: Azure/cli@v1
  with:
    inlineScript: az group delete -n $RG_NAME -y
Summary
Well, this brings the WordPress-on-Azure series to an end. I hope you found the information useful and that it inspires you to experiment with it.
Previous parts:
Related repository: WordPress-on-Azure


Leave a comment